Lips SVG Collection
If you're designing apparel, crafting custom merch, creating social media graphics, or building branded content for your small business or personal project, the Lips SVG Collection is a versatile, ready-to-use asset—but only if you understand what’s truly included and how to use it effectively. Too many creators assume “SVG” means universal compatibility, or that “30 files per format” guarantees seamless results across platforms and machines. That assumption leads to wasted time, inconsistent cuts, blurry prints, or mismatched expectations.
What You’re Actually Getting—and What It’s Really For
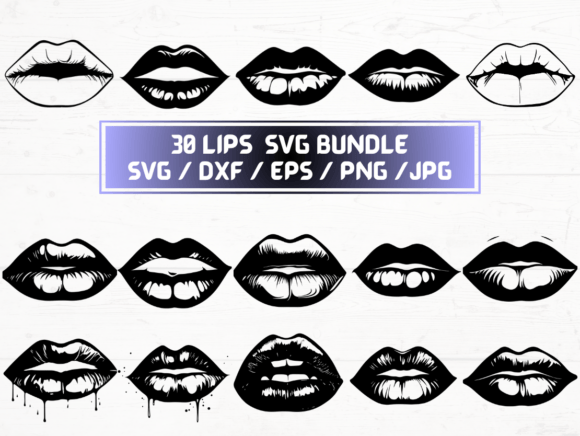
This listing delivers a ZIP folder with five file types—SVG, PNG, DXF, JPG, and EPS—each containing 30 distinct lip-themed designs. These aren’t generic clipart or low-res web images. They’re production-ready assets built for specific workflows:
- SVG files are ideal for Cricut Design Space, Silhouette Studio (with Designer Edition), and web-based editors like Canva (when uploaded correctly).
- DXF files serve laser cutters, CNC software, and older versions of Silhouette Studio that don’t fully support SVG paths.
- PNG files at 300 dpi with transparent backgrounds work well for print-on-demand mockups, digital overlays, or sublimation design layers—not for cutting.
- EPS files offer vector scalability in Adobe Illustrator or CorelDRAW—useful for professional designers refining layouts or preparing press-ready files.
- JPG files are best for quick previews, email attachments, or non-editable presentations—not editing or precision work.
The key insight? Each format has a purpose. Using a JPG when you need crisp vector outlines—or an EPS in Cricut without converting it first—creates avoidable friction.
A Common Misstep: Assuming “More Files = More Flexibility”
Seeing “30 SVG + 30 PNG + 30 DXF…” can feel like getting extra value. But quantity doesn’t equal readiness. One creator spent two hours trying to cut a lip design on their Cricut because they opened the EPS file instead of the SVG—and didn’t realize Cricut Design Space doesn’t natively read EPS without conversion. Another tried printing the PNGs directly from a phone gallery app, only to get pixelated edges on a t-shirt transfer. Neither issue was with the collection itself—it was with mismatched tool-to-file alignment.
That’s why checking your software version and machine compatibility *before* downloading matters. For example:
- Cricut users should confirm they’re running Design Space v7.0 or newer (older versions may misinterpret layered SVG groups).
- Silhouette users with Basic Edition need DXF—not SVG—for full path fidelity.
- Print-on-demand sellers using Printful or Gooten should verify whether their platform accepts transparent PNGs or requires flattened JPGs with white backgrounds.
Transparency Isn’t Automatic—Especially in PNGs
The listing notes “300 dpi with transparent background,” which is accurate—but transparency only works as intended if your editing environment preserves alpha channels. If you open a PNG in Microsoft Paint, save it again, and upload it to a POD site, the background often reverts to white or gray. Similarly, some email clients and older web CMS platforms don’t render transparency reliably.
Better approach: Use tools like Photoshop, Affinity Photo, or even free options like Photopea to verify transparency (look for the checkerboard grid). When prepping for screen use, export as PNG-24; for wide compatibility, consider saving a backup JPG with a solid background—just label it clearly so you don’t accidentally use it for cutting.
Don’t Overlook the “Instant Download” Reality
This is a digital product—no physical item ships. That means no packaging, no returns, and no customer service for file corruption *after* download (though reputable sellers will replace broken ZIPs promptly). So before finalizing your purchase:
- Ensure your device has enough storage for a ZIP containing ~150 high-res files (~80–120 MB typical).
- Confirm your email inbox isn’t blocking automated delivery emails (check spam/junk folders).
- Test your ZIP extraction software—some mobile devices struggle with large archives unless you use a dedicated app like WinZip or iZip.
One freelancer lost a client deadline because she downloaded the ZIP on her iPad, assumed it extracted automatically, and discovered mid-project that the files were still compressed—and her iPad couldn’t open them without third-party help. A quick desktop download would’ve saved three hours.
Scalability ≠ Editability
SVG and EPS files scale infinitely without quality loss—that’s true. But scaling doesn’t mean every element remains editable. Some Lips SVG Collection designs include embedded raster effects (like subtle gradients or texture overlays) that convert to flat shapes when resized in certain editors. Others group lips with decorative borders or speech bubbles; ungrouping them may be required before resizing individual components.
If you plan to recolor or isolate parts—say, just the lower lip for a makeup tutorial graphic—open the SVG in a vector editor first and check layer structure. In Illustrator, use Object > Ungroup and Window > Layers to see nesting. In Silhouette Studio, right-click and choose Release Compound Path if elements won’t separate cleanly.
Realistic Expectations for Beginners
If you’re new to SVG files, start small. Don’t try to layer five lip designs into one complex t-shirt layout on day one. Instead:
- Download just one SVG and one PNG.
- Import the SVG into your cutting software and run a test cut on scrap material.
- Open the PNG in Canva or PowerPoint and drop it onto a mockup template.
- Compare both outputs side-by-side: Does the cut match the shape you see on screen? Does the PNG align cleanly over your product photo?
This builds confidence before scaling up—and reveals workflow gaps early, not after you’ve paid for bulk materials.
Final Check Before You Use or Share
Before applying any design from the Lips SVG Collection to a client project, merch line, or public post, ask yourself:
- Is this file type appropriate for my output method? (Cutting = SVG/DXF; Printing = PNG/EPS; Web display = optimized PNG/JPG)
- Does my software support the version of SVG used? (Most modern tools handle SVG 1.1 fine; avoid legacy SVGZ or animated SVGs unless confirmed.)
- Have I verified resolution, transparency, and color mode? (RGB for screens, CMYK for professional print—though most PODs handle conversion automatically.)
- Is this usage aligned with the license? (This collection is for personal and commercial use—but not for resale as standalone digital files or templates.)
When used intentionally, the Lips SVG Collection saves hours of design time, adds playful consistency to branding, and supports creative experimentation across mediums. The difference between frustration and flow isn’t in the files themselves—it’s in matching the right file, to the right tool, at the right stage.